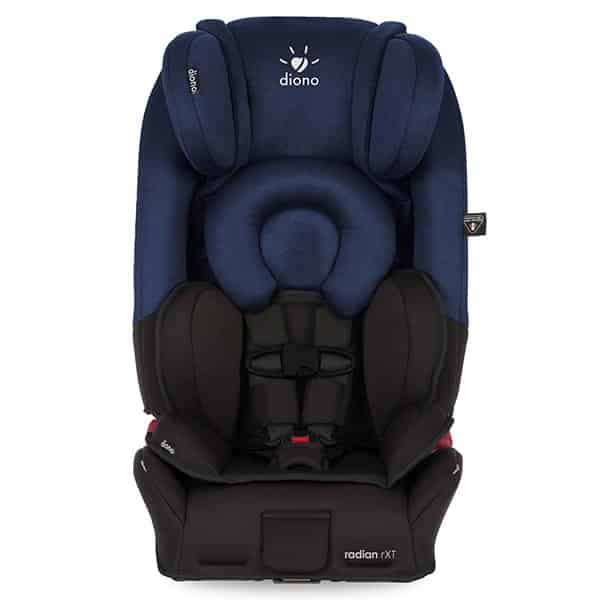
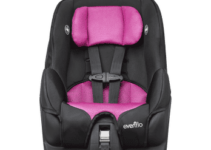
The Diono Radian RXT isn’t new on the block but still remains a heavy hitter among newer brands and models. From its impressive safety statistics to its vast array of color options, this car seat has always been popular among parents.
But how does it compare to other brands? And how can you tell if it’s the right choice for you? Read the review below to find out.
Or, if you already know you want it:
Click here to get the Radian RXT at the Diono Site
Table of Contents
- What Are the Main Features of the Diono Radian RXT?
- How does it compare to other brabds:
- Diono Radian RXT vs Diono R120 and R100
- Diono Radian RXT vs Diono Rainier
- Diono Radian RXT vs Graco Nautilus
- Diono Radian RXT vs GTX
- Diono Radian RXT vs Britax Advocate
- Diono Radian RXT vs Chicco Nextfit Zip
- Diono Radian RXT vs Britax Marathon
- Diono Radian RXT vs Clek Foonf
- Diono Radian RXT vs Britax Frontier
- Diono Radian RXT vs Clek Fllo
- Diono Radian RXT vs Maxi Cosi Pria 70
- Britax Boulevard vs Diono Radian RXT
- Installation and Care
- The Bottom Line
What Are the Main Features of the Diono Radian RXT?
The Radian RXT boasts extended rear facing capability, which should be at the top of your priority list when shopping, and it can be used from infancy to booster. It is built to last, and is known for its high quality materials. It is slimmer than your average car seat which makes it very useful if you have multiple children.
Pros and Cons
Pros:
- Elite safety specifications
- Quality built
- Accommodates from infant to booster
- Promotes longer rear facing
- Thinner seat makes for more room in your vehicle
- Can use 3 across
- Folds flat for travel and can be worn as a backpack
- 10 year life warranty
Cons:
- Height makes it difficult in small vehicles
- Pricey
- Need to buy add-on’s to get best use out of it
- Confusing installation
- Head “wings” not very adjustable
- Heavy
Safety Review
There are a few things to look for when reviewing the safety of a car seat: frame, rear facing capacity, and secure installation. This one meets all of these standards and then some.
The frame is made of steel. Diono wrapped the steel frame in engineered plastic. This helps brace for even extreme crash forces. Diono didn’t just stop with this intense frame, the sidewalls are also reinforced aluminum. Finally, energy absorbing EPS foam is present throughout to reinforce safety for your child.
The rear facing timeline is from 5 pounds to 45 pounds! That’s a very expansive length of time. The longer you can keep your child rear facing the safer they will be. A lot of parents mistakenly turn their child around at 1 to 1.5 years old. This subjects them to blunt force if there were to be an accident.
The Diono Radian rXT uses SuperLATCH technology to ensure a safe installation every time. It also has rubber grips on the bottom of the seat to be even more secure. Finally, it has rear facing tether capabilities. This is pretty unique to rear facing car seats but definitely adds to the safety of this product.
Weight, Dimensions, and Weight Limits
The Diono Radian rXT is 17 inches wide on the outside and weighs 26.5 pounds. On the inside, it is about 14 inches wide by the shoulders and a little wider by the upper legs. The weight limits vary for rear-facing, forward-facing, or the booster mode.
Rear-facing weight limits are between 5 and 45 pounds. It allows for up to 44 inches of height which is where the prolonged rear-facing attribute comes into play. When you look at other carseats longevity in the weight and height department, you are most likely going to see lower numbers there.
Forward-facing it gives you a range of 20 to 80 pounds. This also allows you to reach up to 57 inches in height. As you may know, it’s recommended that you leave your child rear-facing as long as possible. Given the rear-facing statistics of the Dino Radian RXT, that shouldn’t be an issue.
The same goes with forward-facing. You will want to keep them in a car seat as long as possible. This car seat beats the pants off others in the ranges available to safely and comfortably keep your child in the car.
Finally for the booster mode. Your child can sit in the booster seat from 50 to 120 pounds and up to 57 inches in height. You want to double check to make sure your child’s shoulders reach the 4th pair of harness slots before making the move to booster.
Just like with the other two options, you want to keep your child in the booster mode as long as possible, too. How will you know when they no longer need the booster seat? Well, I would recommend keeping them in there until they reach the end of the allotted weight and height restrictions. However, you must make sure that their belt stretches from over the shoulder, across their chest, and is flat on their upper thighs. If it isn’t in that position they are too small yet.
Using it for newborn babies and infants
The Diono Radian RXT really is an excellent choice for all age groups. However, I do love a few things in particular about the newborn or infant stage capabilities.
A lot of times when you are looking for your first car seat, you will find that they are for newborns to 1 year olds or so. That’s something I really love about this one: it grows with your child.
They also have infant cushions and memory foam. This is important with a newborn so that they are well supported. If your child is well supported and comfortable in their seat, both you and they will have a much better experience riding in the car. It also saves you from having to buy an infant insert on your own.
Using it for toddlers and older kids
The Diono Radian RXT has such a wide range of allowances for children’s sizes. Using it for toddlers and older kids is a breeze. It’s easier to have your child be comfortable rear-facing for longer. A lot of car seats can get uncomfortable to sit in rear facing once they reach about 2, but this one really allows for room while keeping them safe.
How does it compare to other brabds:
It’s always smart to compare brands before making a purchase. The Diono Radian RXT is a fine choice but let’s see how it compares to other makes and models.
Diono Radian RXT vs Diono R120 and R100
The RXT has deeper side walls than the R120 or R100. This is better for safety reasons and should definitely be a huge consideration when making your purchase. The RXT is also less wide than the other two. It takes up less space across leaving you with more room in your vehicle for more car seats.
Diono Radian RXT vs Diono Rainier
The Radian RXT is less wide than the Rainier. Just like mentioned before, it leaves you with more room for multiple seats or whatever else you may want to store with your precious cargo. However, I will say that I like that the Rainier has a longer rear facing timeline.
Diono Radian RXT vs Graco Nautilus
The Radian RXT is less wide as is the case when you compare it to most brands. However, there are a few issues with the Graco Nautilus worth mentioning. There have been complaints of the crotch belt being uncomfortable, for boys and heavier kids especially. Also, it seems you have to rethread the harness every time you want to adjust it. That could get really annoying.
Diono Radian RXT vs GTX
The Radian RXT and GTX are really very similar. However, the GTX has a few extras including: the full-size waterproof undermat. That’s a really nice addition because we all know we need as much protection from liquid accidents as possible. It also has a lifetime warranty. That’s extremely beneficial if you plan on using it for multiple children. Finally, it has PureFab stain resistant velour fabric. Again, if you are a mom, you know how much stain resistant fabric comes in handy.
Diono Radian RXT vs Britax Advocate
While both are excellent choices, the Britax Advocate is only a two way seat while the Radian RXT has 3 options. The Diono Radian also has a higher range for both rear facing and forward facing weight and height limits. This is beneficial because it means you can use it longer with more confidence.
Diono Radian RXT vs Chicco Nextfit Zip
The Diono Radian RXT outperforms the Chicco Nextfit Zip in several capacities. First, it has a 3 in one capability (rear-facing, forward-facing, and booster). The Chicco Nextfit Zip only has rear-facing and forward-facing attributes.
Second, it has a huge range of weight and height limits while the Chicco Nextfit Zip has a pretty small range. Here, the Radian RXT clearly wins out over the Chicco.
Diono Radian RXT vs Britax Marathon
Again, the Radian RXT is a all-in-one while the Marathon is only for rear-facing and forward facing. The Britax is generally more expensive. It’s important to note that the it also has a higher rear-facing weight limit. That’s always a gold standard to me.
Diono Radian RXT vs Clek Foonf
The Clek Foonf is definitely fashion-trendy. However, it cannot offer the all-in-one capabilities like the Diono Radian RXT. The Radian RXT also sits really low on the seat and that makes it easier to get in and out for loading. It offers longer rear-face seating, too.
Diono Radian RXT vs Britax Frontier
One of the main differences here is that the Britax Frontier is only forward-facing. That should definitely settle if you are deciding between the Radian RXT or the Britax Frontier. It is also thinner so will fit 3 across easily, and is ideal if you have a smaller vehicle.
Diono Radian RXT vs Clek Fllo
The Diono Radian RXT has the advantage of a higher weight capacity as well as the all-in-one conversion. Other than that, they are both really nice and have good attributes. I do think it wins out again over the Clek Fllo.
Diono Radian RXT vs Maxi Cosi Pria 70
This is a tough one. I think that these are both really excellent choices. They are both all-in-one seats with a very comfortable ride for your kiddo. However, the Diono Radian RXT does have a higher weight capacity than the Maxi Cosi Pria 70.
Britax Boulevard vs Diono Radian RXT
I personally like the Britax brand (they’ve got the Marathon and Advocate Clicktight as well), but the Radian RXT wins out over the Boulevard as far as weight capacity and all-in-one capabilities. That and it’s slim design make it almost impossible to beat.
Installation and Care
How to Install It Forward Facing
It is safest to always refer to the product’s manual when installing. However, these instructions will still get you through. These instructions are for using the lap-shoulder belt method.
1 .Place the restraint in a forward-facing position.
- Push the belt through the forward-facing belt path and behind the restraint cover. Buckle it making sure that the belt lays flat and not twisted.
- Pushing your weight on the carseat to push it down in the the vehicle seat, pull the shoulder portion of the belt to remove any slack. Tighten up the lap portion of the belt.
Note: The vehicle cushions should be pressed down where there is contact with the carseat.

How to Install It Rear Facing
These instructions are for installing in a rear facing position with a lap shoulder belt.
- Make sure that the detachable base is securely attached to the bottom of the car seat.
- Put the car seat bottom and base in the proper position. (Both the base and car seat should be flat on the vehicle seat with the front of the car seat against the back of the vehicle’s seat.)
- Push the belt through the rear-facing belt path. Make sure that the belt lays flat with no twisting.
- Pushing your weight on the carseat to push it down in the the vehicle seat, pull the shoulder portion of the belt to remove any slack. Tighten up the lap portion of the belt.
Note: The vehicle cushions should be pressed down where there is contact with the carseat.

Latch Installation
These instructions are only for forward-facing.
- Make sure that your vehicle has it’s own LATCH anchors where you are going to place the car seat. If it does not, you must refer to the belt instructions instead.
- Find the LATCH belt system secured in the storage compartment of the car seat, it’s located on the back of the car seat.
- Push the red release button to remove each LATCH connector and webbing.
- Take the narrow LATCH tethering strap out of the plastic strap guides on side of the seat.
- Put the car seat down in a forward facing position.
- Pass the LATCH belt through the forward-facing belt path and behind the restraint cover.
- Make sure the LATCH belt lays flat without any twisting.
- Attach each connector to the LATCH anchor that is closest to each side of the car seat.
- The LATCH connectors will “click” to confirm that it is attached to its anchor.
- Place the connector mechanisms behind the car seat.
- Make sure to pull the loose end of the LATCH strap through the back of the car seat.
- Push down with your left knee on the back inside of the car seat.
- Lean your left shoulder against the car seat back to push the car seat into the vehicle seat.
- Pull the strap upwards with both hands toward the vehicle ceiling until its nice and tight.
- Try and move the car seat around to see if it is secure. It shouldn’t move and the vehicles cushions should be compressed where the car seat makes contact with them.
How to Wash It
Let’s cover the different parts and how to wash them.
The Shell
Using a damp cloth with a mild soap, wash the plastic shell off. Try not to get it over wet so that it dries easily.
The Cover
After taking the cover up, you can hand wash it with a mild soap and hang dry. You can also put it in a machine washer as long as you put it on a light or delicate cycle. It’s recommended to hang dry but some parents have claimed putting it in the dryer on tumble dry is okay, too. Another trick is to have an extra spin cycle after washing so that more of the moisture comes out.
The Harness Straps
Remove the harness straps. Wash them with mild soap and water. Do not use any harsh chemicals or cleaners on the harness straps as it may affect their bond. Hang dry.
The Buckle
Remove the center buckle. You can rinse it thoroughly in warm water and mild soap. If there is a particularly stubborn substance, you can soak it in water overnight to loosen up the debris. Make sure not to use any lubricant or harsh chemicals on the buckle. Thoroughly dry the buckle.
After cleaning, repeatedly connect and detach the buckle to make sure you hear a strong clicking noise.
How to Recline It
The seat should only be reclined in a forward facing position.
To LOWER the Adjustable Bottom:
- Pull the bar on the bottom of the seat upward.
- While keeping pressure on the bar, pull the bottom out to its lowered position.
- Release the bar.
- Jiggle the seat to make sure that it is securely in place.
To RAISE the Adjustable Bottom:
- Pull the bar on the bottom of the seat upward.
- Keeping pressure on the bar, push the adjustable bottom back into the seat.
- Release the bar.
- Jiggle the seat to make sure that is is securely in place.
How to Convert to Booster
- Remove the buckle and harness from the RXT.
- Place the booster seat in the proper position (flat on the seat with the car seat’s back against the vehicle seat’s back.
- If you have LATCH capability, use that and/or the tether.
- Properly position your child in the booster. Make sure that they are sitting upright and are leaning all the way back.
- Adjust the headrest to the proper height.
- Pull the belt across your child.
- Make sure the lap portion of the belt rests within both of the lower belt guides.
- Buckle on the outside of the restraint.
What colors are available?
The Diono Radian RXT comes in a vast array of colors and patterns. You can choose from the following: Black Cobalt, Black Mist, Black Plum, Black Scarlet, Essex, Midnight, or Shadow.
Is it Flame Retardant?
From what I can tell, all car seats have to meet federal requirements for flame retardants. What is that exactly? It means that they have to have some kind of flame retardant. Diono complies with this so it’s safe to say there is some flame retardant.
What is its Lifespan?
The Diono Radian RXT has a 10 year lifespan. That’s good news for you! You can use for multiple children which is really handy.
Using it Three Across
One of the best qualities of this seat is that it can easily fit 3 across in your backseat. It’s thin but tall making it perfect to have several in a row. I love this attribute especially if you have multiple children.
Using it on an Airplane
First, it should be noted that the Diono Radian RXT is FAA certified to be used as a harness restraint only! That means you can’t use it as a belt booster seat. Nevertheless, using your car seat on the airplane is an added comfort you will be happy to have.
Rear-facing Installation
- Adjust the belt buckle to it’s shortest length.
- Make sure the buckle is accessible for release.
- Ask your flight attendant for a belt extender.
- Use the extender to adjust the belt length.
- Follow the rear-facing installation instructions listed above.

Forward-facing Installation
Use the belt forward-facing installation instructions listed above.

The Bottom Line
The Diono Radian RXT has so many qualities that you should be looking at, and might just end up being the best convertible car seat for you.
From it’s all in one capacity to longer rear-facing credentials, it has it all. I love the different colors and styles to choose from coupled with their safety precautions. It really is the bread and butter of car seats.

