By Katelyn Geselle, CPST (child passenger safety technician) & CHES (certified health education specialist)
Like most parents, I’m very budget-conscious. Only having to invest in ONE seat sounds a lot better than having to buy two, three, or even four different ones.
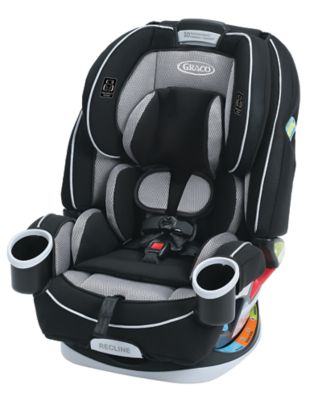
That’s why I wanted to write this Graco 4Ever car seat review. This seat just may be the only one you’ll ever need! From infancy to elementary school, it will be with you every step of the way. It has four modes: rear-facing, forward-facing, highback booster, and backless booster.
As a Certified Passenger Safety Technician (CPST) at a local hospital, I can tell you that parents who bring me this seat love it as well. When I check their install, 9 times out of 10 they’ve got it right.
My favorite parts about this seat are the ease of installation, 10-year expiration date, no-rethread harness, and machine-washable cover.
Table of Contents
- Who should get the Graco 4Ever DLX and who shouldn’t?
- Pros and Cons
- What are the child weight and height limits?
- How easy is the Graco 4Ever DLX to install?
- How safe is the Graco 4Ever DLX?
- How easy is the Graco 4Ever DLX to clean?
- Features
- What is included with the Graco 4Ever DLX?
- Are there additional accessories I can buy?
- Where to find important information
- Frequently Asked Questions
- Specifications
- Which model should I get?
- How does the Graco 4Ever DLX compare to other all-in-one car seats?
- Verdict
Who should get the Graco 4Ever DLX and who shouldn’t?
Who Should
The Graco 4Ever DLX convertible car seat is a great solution for parents who want the best for their kids without the hassle of having to learn a new seat every couple of years. In the 4-in-1 car seat market, this seat is a solid contender. Stand-out features include ease of installation and machine-washability.
Caregivers who only want to drop money on one seat will love this option. The 10-year expiration means that your child will be able to use it for the full range of 4-120 pounds.
Two booster modes (highback and backless) allow your child to choose which is right for them. Having a say in the matter will make it so much easier to convince your child to continue using a booster seat! Fewer fights, safer rides, what’s not to love?
Who Shouldn’t
If your baby is under 4 pounds, the Graco 4Ever DLX won’t work for you. It sounds unbelievable, but I do see more and more three-pound babies going home from the NICU! This seat has a minimum weight requirement of 4 pounds, so if your infant is below that, you’ll need to pick a different seat.
Although the installation is easy, the seat is heavy and bulky. If you need to transfer the car seat between vehicles often, this one might be inconvenient.
This 4-in-1 seat is large, so it may not fit properly in some smaller cars. When installing rear-facing, you need to be able to slide a piece of paper between the front seat and the car seat. It can’t be squished in too tight. Additionally, if you need to fit multiple car seats side-by-side in your vehicle, this is probably not the right choice.
Pros and Cons
Pros
- No need to purchase another seat*
- Machine-washable Rapid Remove cover
- No-Rethread Simply Safe Adjust harness
- 10-year expiration date
- Easy installation with InRight LATCH and integrated lockoff
- Harness storage slots
- FAA-approved for use on airplanes (except in booster mode, but no booster seats are allowed on planes)
*Unless your child still doesn’t fit in a seat belt after reaching 120 pounds, or the seat expires, whichever comes first
Cons
- Not an infant carrier
- Cannot be used with a stroller
- Heavy and bulky
- Higher price range than some other 4-in-1 seats
- Seat may become worn after using it for so long
- Older children may feel like they are still in their “baby” seat
What are the child weight and height limits?
Rear-Facing Mode: 4-40 pounds; head must be 1 inch or more below the headrest adjustment handle
Forward-Facing Mode: 22-65 pounds; 49 inches or less
Highback Booster Mode: 40-100 pounds; 43-57 inches
Backless Booster Mode: 40-120 pounds; 43-57 inches
LATCH limits: Child must be 45 pounds or less to use lower anchors. Once over 45 pounds, seat belt installation method must be used.
How easy is the Graco 4Ever DLX to install?
Although this seat is bulky and seems hard to handle at first, it is actually quite easy to install!
Lower anchor installation is a breeze with Graco’s InRight LATCH system. Graco 4Ever seats have push-on lower anchor connectors, which are much easier to install (and uninstall!) over clip-on style.
Graco has made forward-facing seat belt installation easier with an integrated lock-off. This is the feature that differentiates the 4Ever DLX from the discontinued 4Ever.
The belt paths are color-coded, so you never have to guess which openings are for rear-facing (blue), forward-facing (orange), and booster (green). The sections in the manual follow the same color-code. It’s easy to find information corresponding to each mode with this system.
Other general notes: Some overhang is allowed, but 80% of the base needs to be in contact with the vehicle seat. Remember to always choose a level place to park your car for a proper install.
CPST Tip: Before installing in the car, place the seat on the ground in a firm, level location (hardwood floor, sidewalk, etc.). Adjust the recline appropriately for the direction of the seat and weight of the child. Then sit your kiddo in the seat. Use the No-Rethread Simply Safe Adjust Harness to get the straps at the correct height: at or BELOW shoulders for rear-facing, at or ABOVE shoulders for forward-facing. Determine if the crotch buckle is in the right slot. The buckle should be between their legs, not underneath their bottom. If it needs to be moved out to the second slot, do so now by following the instructions and photos in the manual. Ta-da! The seat is ready to be installed! I’ve seen it over and over again where a parent fully installs the seat, thinks they have it perfect, but forgot about harness height, recline, and/or buckle position. TRUST ME– these are all much harder or even impossible to adjust once the seat is installed!
How to Install Rear-Facing with LATCH
To install rear-facing with LATCH, first pick a seating position with dedicated lower anchors. You can’t borrow from another seat. For example, if you want to use the middle seat, it must have its own lower anchors. If only the outboard seats have lower anchors, you can’t use the middle seat. Sharing anchors is also not allowed. Only attach one LATCH connector per lower anchor.
Adjust to the proper recline and harness setting. Check the recline angle indicator to make sure the bubble is completely within the blue line. The harness must be at or below the infant’s shoulders.
Make sure the LATCH strap is going through the BLUE rear-facing belt path. It should be lying flat, free of twists. Press the gray button near the right lower anchor connector and pull to extend the strap.
Connect one LATCH connector to each vehicle lower anchor. Push the LATCH connectors until you hear a click. Tug on them to make sure they have properly connected.
Tighten the strap. Pull on the loop near the right LATCH connector. I like to use my knee to push the car seat into the vehicle seat. You can also push down on the seat panel with your free hand. To get a better angle, you can thread the pull-strap through the fabric of the armrest at the belt path.
Keep pulling and tightening until the seat does not move more than an inch side to side.
How to Install Rear-Facing with Vehicle Seat Belt
Choose a seating position. Any seat with a lap-and-shoulder belt or lap-only belt is acceptable.
Adjust to the proper recline and harness setting. Check the recline angle indicator to make sure the bubble is completely within the blue line. The harness must be at or below the infant’s shoulders.
The LATCH strap must be threaded through the orange forward-facing belt path so it’s out of the way.
Route the seat belt through the blue rear-facing belt path. Once the belt is lying flat and free from twists, buckle it.
For installation with a lap-and-shoulder belt, lock the shoulder belt by pulling it all the way out of the retractor. As you feed it back in, it should make a subtle clicking sound. This indicates that the belt is locked.* Tighten the seat belt by pulling from the buckle and feeding the slack up back through the retractor.
For a lap-only belt, buckle the seat belt and pull on the tail to tighten.
Push down on the seat panel to get out more slack. It’s easier to tighten if you get your hands underneath the fabric cover. Continue to pull and tighten until the seat does not move more than one inch side to side.
*If your seat belt does not lock, you’ll need to use a locking clip. You can order one for free on Graco’s website. These little metal accessories are a real pain in the butt to use. I would suggest setting up a car seat check with a CPST for help.
How to Install Forward-Facing with LATCH
Switching from rear-facing to forward-facing position is NOT as simple as releasing the lower anchor connectors, flipping the seat around, and reclipping. This is a VERY common mistake I see when inspecting this seat installation! After turning the seat, you must re-thread the LATCH strap through the forward-facing belt path (indicated by orange color).
Keep in mind that LATCH can only be used when the child is 45 pounds or less. Once they are over that weight limit, seat belt install is required.
First, choose an appropriate seating location with dedicated vehicle lower anchors. Recline the seat– position 4 or 5 if the child is 40 pounds or less; position 6 if they are over 40 pounds. Adjust the harness height. The harness must be at or ABOVE the child’s shoulders while forward-facing.
Make sure the LATCH strap is going through the ORANGE forward-facing belt path. It should be lying flat, free of twists. Press the gray button near the right lower anchor connector and pull to extend the strap.
Unhook the top tether from its storage location on the back of the car seat. Lay it up and over the front of the car seat so you can access it. We will connect the tether after tightening the lower anchors.
Connect one LATCH connector to each vehicle lower anchor. Push the LATCH connectors until you hear a click. Tug on them to make sure they have properly connected.
Tighten the strap. Pull on the loop near the right LATCH connector. I like to use my knee to push the car seat into the vehicle seat. You can also push down on the seat panel with your free hand. To get a better angle, you can thread the pull-strap through the fabric of the backrest at the belt path.
Keep pulling and tightening until the seat does not move more than an inch side to side.
Attach the tether strap. The location of the tether connection varies by vehicle. Usually these are either on the back of the vehicle seat or on the ceiling. Consult your vehicle’s manual if you can’t find it. If the tether connector is on the back of a seat with a headrest, route the tether underneath the headrest.
Pull on the tether strap to tighten it, removing all the slack.
How to Install Forward-Facing with Vehicle Seat Belt
If the child is over 45 pounds, you must install the Graco 4Ever DLX convertible car seat with the vehicle seat belt.
Choose a seating position. Any seat with a lap-and-shoulder belt or lap-only belt is acceptable.
Recline the seat– position 4 or 5 if the child is 40 pounds or less; position 6 if they are over 40 pounds. Don’t worry about harness height yet. We’ll adjust that towards the end.
Unhook the top tether from its storage location on the back of the car seat. Lay it up and over the front of the car seat so you can access it. We will connect the tether after tightening the seat belt.
The LATCH connectors must be clipped in their storage location underneath the seat panel– one on either side of the recline handle.
One of the great features of the 4Ever convertible car seat is an integrated lock-off for forward-facing installation.
To locate the lock-off, adjust the harness height to the highest position. Undo the chest clip and crotch buckle. Unsnap the cover to reveal the hard plastic seat back. You’ll see the red and gray lock-off in the middle back of the seat. Flip down the gray panel, and the red panel will flip up.
Route the vehicle seat belt through the orange forward-facing belt path and buckle it. The belt should be flat and free from twists.
Press down with one hand onto the seat panel. Use your knee to push the car seat snugly against the vehicle seat. Tighten the seat belt by pulling firmly on the shoulder belt.
Once the seat belt is tight, close the lock-off by first flipping down the red panel then closing the gray panel on top of the red. Check that the lap and shoulder belt are both underneath the lock-off. There is no need to lock the seat belt when you’re using a lock-off.
Check that the seat does not move more than an inch side-to-side.
Rebutton the cover. Adjust the harness height. The harness must be at or ABOVE the child’s shoulders while forward-facing.
Attach the tether strap. The location of the tether connection varies by vehicle. Usually these are either on the back of the vehicle seat or on the ceiling. Consult your vehicle’s manual if you can’t find it. If the tether connector is on the back of a seat with a headrest, route the tether underneath the headrest.
Pull on the tether strap to tighten it, removing all the slack.
How do I know if the car seat is correctly installed?
To test for correct installation, use your non-dominant hand to wiggle the seat at the belt path. The car seat should not move more than one inch side-to-side. Any other movement is actually good. We want crash forces absorbed by the seat, not your child!
When and how do I switch to highback booster mode?
There are a few prerequisites your child must meet to switch to highback booster mode. First of all, they must be at least four years old. They have to be at least 40 pounds and 43 inches (3’7”). These are the minimum requirements. However, the child should remain forward-facing with the harness as long as possible, ideally until they outgrow the weight and/or height limits of that mode.
As with any booster seat, always choose a seating position with a lap AND shoulder belt! Lap belts alone do not secure a child in the event of a crash and are not approved for use with boosters. (This is why boosters are not allowed to be used on planes.)
The first step in switching to highback booster mode is storing the harness system. You’ll find the storage panel on the seat back, underneath the padding, just above the lock-off.
Undo the chest clip and crotch buckle. Open the storage panel by squeezing the tab on the right. With the harness as loose as it goes, tuck the harness including shoulder pads, chest clip, and crotch buckle tongues into the open panel. Hold everything in place and close the panel. Honestly, I find this a bit tricky. You have to have all of the pieces lying very flat and in just the right places in order to close the panel. This is one element in which the Graco 4Ever convertible car seat falls short.
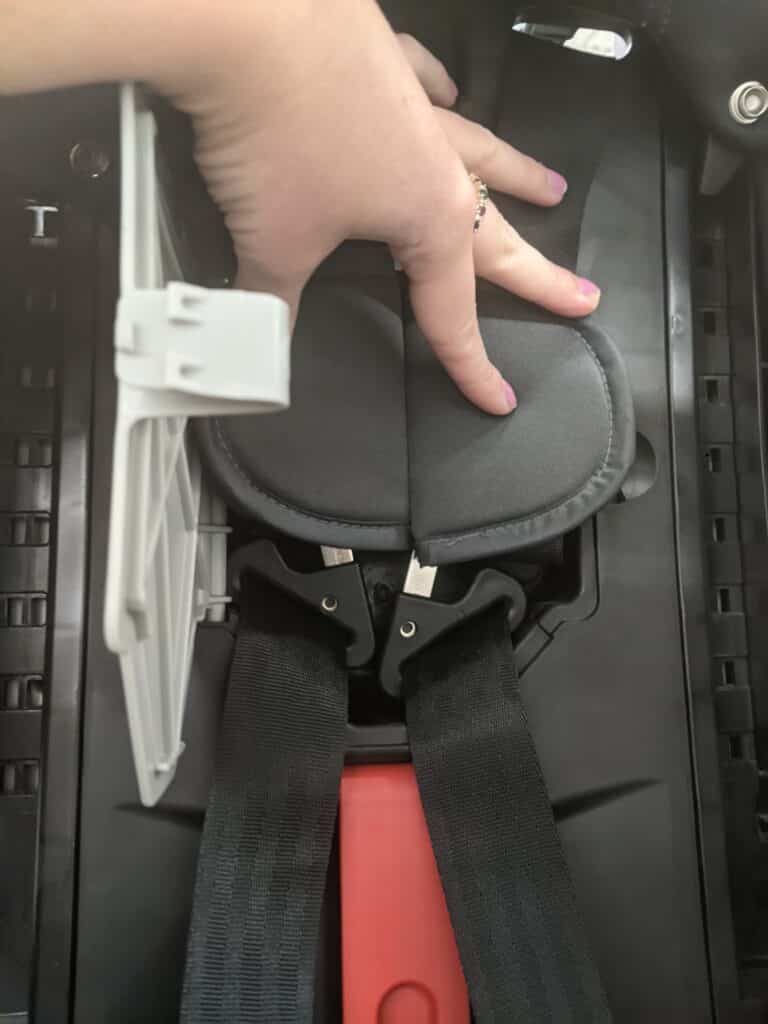
Next, store the crotch buckle by threading it out of the fabric cover and lying it flat in the depression in the seat panel.
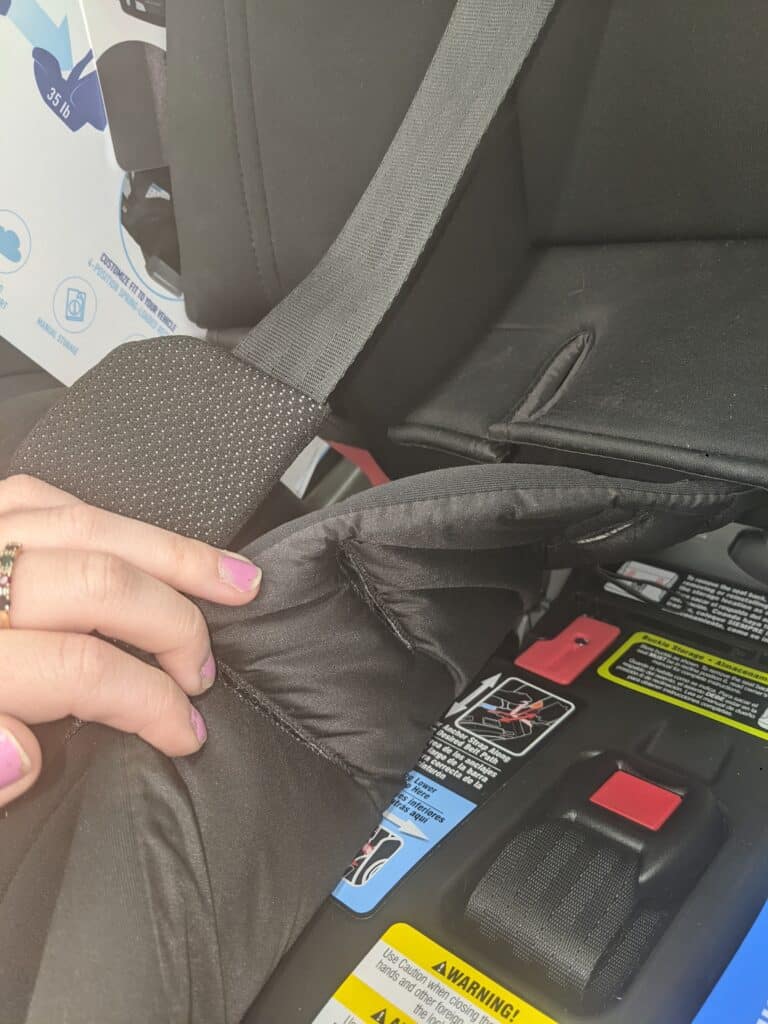
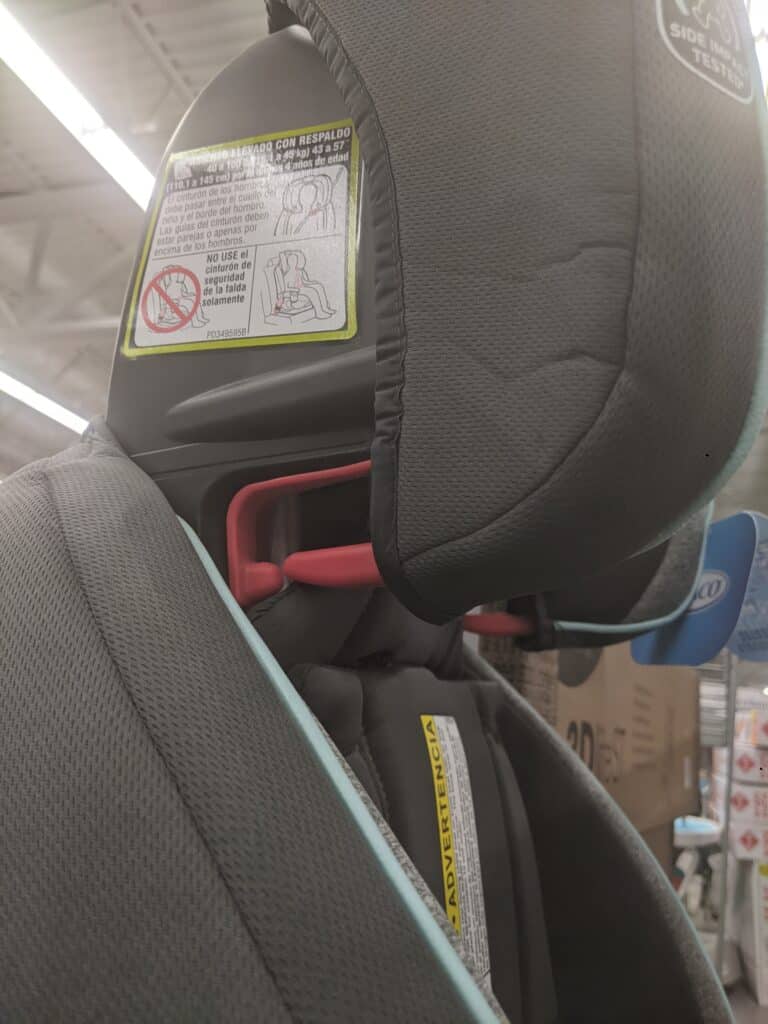
Adjust the headrest to the proper height. The red belt guides on either side of the headrest need to be at or just above the child’s shoulders. Recline the seat to position 6.
If your vehicle manual allows, you can install the highback booster with LATCH routed through the orange forward-facing belt path. However, it is not required for the safety of the child. Booster seats are for positioning, not harnessing. LATCH simply helps the highback booster seat to stay in place when kids are hopping in and out of the car and when it is empty. If you choose to use the lower anchors, you also have to use the top tether. But if you don’t want to use the anchors, don’t tether. It’s all or nothing– you can’t use one without the other.
Whether or not you’re using LATCH, thread the vehicle shoulder belt through the red guide on the car seat headrest. This can stay in place even when there is no child occupying the seat.
To secure the child, route the lap belt portion underneath both armrests, following the green booster belt path. Buckle the seat belt. The side of the shoulder belt closest to the buckle should also be underneath that armrest.
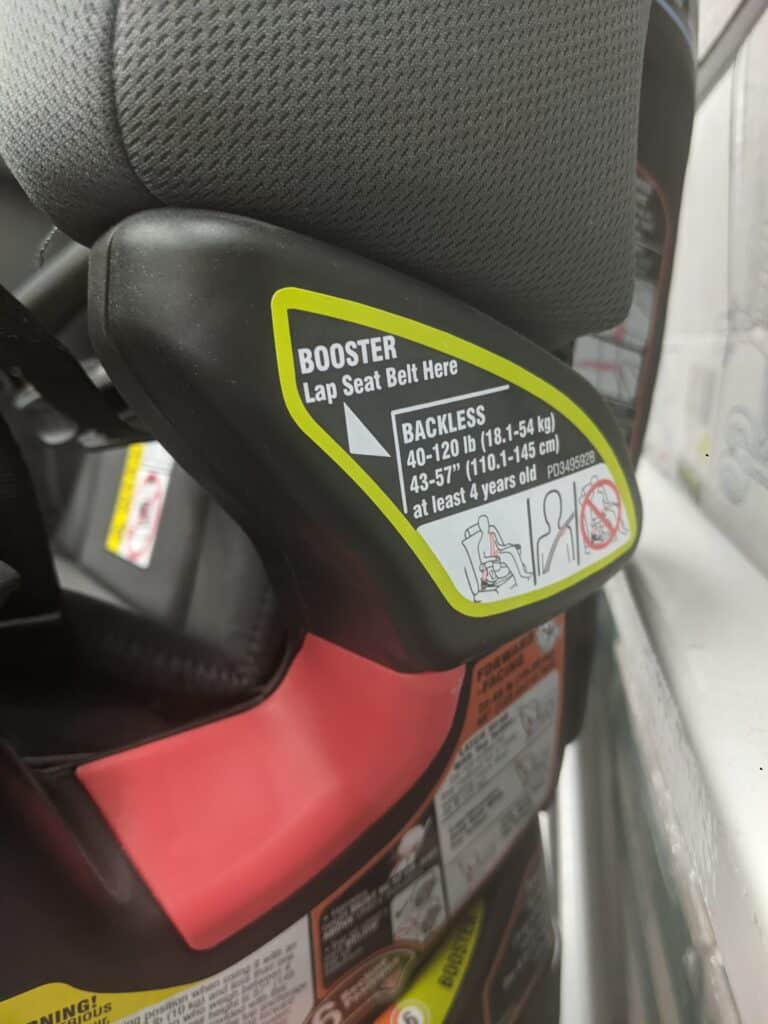
The lap belt should be lying flat across the child’s lap. The shoulder belt should be against their collarbone. If the shoulder belt is too high, touching their neck, lower the adjustable headrest for a better fit.
Highback booster mode on the 4Ever DLX has a weight limit of up to 100 pounds.
When and how do I switch to backless booster mode?
Once your child has reached 100 pounds, it’s time to switch to backless booster mode.
However, the lower limit is 40 pounds, just like the highback booster. You may choose to skip highback booster mode entirely and go straight to backless. This is completely up to the caregiver and child. Both options are safe as long as the seat belt fits correctly.
The Graco 4Ever DLX convertible car seat can be used in backless booster mode up to 120 pounds and 57 inches (4’9”). By this time, you will need to remind yourself of the expiration date on the seat. Just because the seat has expired and/or your child has reached the height/weight limits does not necessarily mean they are ready to use only a seat belt. If your child outgrows the 4Ever DLX or if the seat expires before they’re ready to use just the seat belt, you’ll need to purchase a new booster seat.
To switch from highback to backless booster mode, we have to remove the seat back. Make sure the seat is reclined to position 6. Loosen the harness straps, unbuckle everything, then flip the seat around. On the back of the seat, unhook the harness straps from the metal splitter plate.
Make sure the LATCH strap is routed through the orange forward-facing belt path. Clip the lower anchor connectors onto their storage hooks on either side of the seat back. Clip the tether onto its storage hook at the top of the seat back.
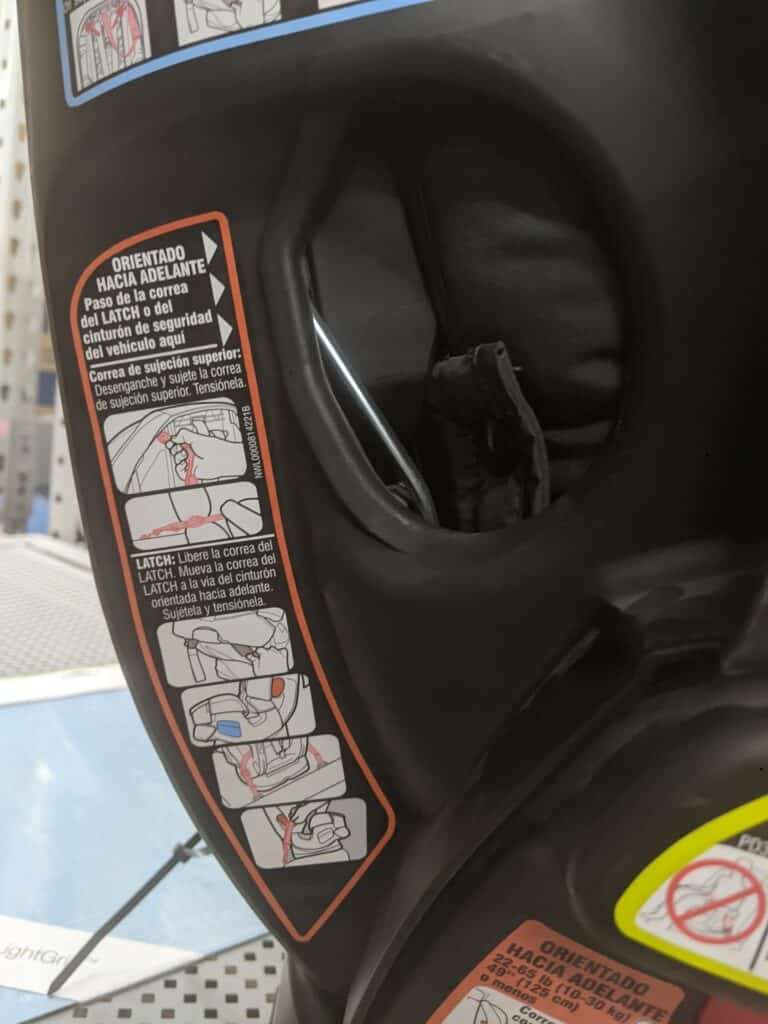
Unsnap the cover of the seat panel and lift the fabric up. Locate the two red clips that are locking the seat back onto the base. Lift each one up and slide them together toward the center of the seat. Push the seat back forward and pull up at the same time. The seat back will lift off of the base. Replace the red backrest locks. Make sure they are flush with the seat.
Tuck the metal splitter plate into its storage location on the seat above the red backrest locks. Store the crotch buckle by threading it out of the fabric cover and lying it flat in the depression in the seat panel.
Attach the fabric cover to the base. Find the four elastic bands underneath the cover and loop them onto their respective connection spots on the base.
Now we’re ready to put the backless booster seat in the car. As with any booster seat, always choose a seating position with a lap AND shoulder belt! With a backless booster seat, you have to use a seating position with a headrest, to protect the child’s neck in case of a collision. Position the booster seat so the cup holders are closer to the front of the vehicle.
Unlike highback mode, there is no option to use LATCH for backless booster mode. The booster seat will just be sitting loose on the vehicle seat.
To secure the child, route the lap belt portion underneath both armrests, following the green booster belt path. Buckle the seat belt. The side of the shoulder belt closest to the buckle should also be underneath that armrest.
The lap belt should be lying flat across the child’s lap. The shoulder belt should be against their collarbone. If the shoulder belt is too high, touching their neck, use the belt positioning clip that came with the seat.
To attach the belt positioning clip, thread the looped end of the strap (the side without the clip) through the same slot as the harness adjustment strap. This is where you stored the metal splitter plate. You may have to temporarily remove the fabric cover’s elastic bands to access this slot. Pull the positioning clip and the rest of the strap completely through the loop until it is secured onto the base. Push the red positioning clip up through the slot in the fabric of the seat cover. The belt positioning clip is now installed.
To use the belt positioning clip, have your child sit in the backless booster seat. Hook the red positioning clip onto the shoulder belt. The black strap will be behind the child’s back. Tighten the belt positioning clip by pulling on the strap until the shoulder belt is at the correct position over the child’s collarbone and away from their neck.
Should I use highback or backless booster mode?
Both highback and backless booster mode are safe as long as the seat belt fits correctly. With the Graco 4Ever DLX, both modes can be used starting at 4 years old and 40 pounds. So how do you choose?
In my opinion as a CPST, there are some advantages to using highback.
I find that parents are able to get a better seat belt fit more consistently with the highback booster. This is especially true with younger and smaller children. The belt positioning clip is annoying and hard to use correctly. It’s so much easier to use the solid guides on the headrest of the highback booster.
Kids also like the headrest for sleeping more comfortably in the car. Because there is a built-in headrest, the highback booster can be used at any seating position, even if there isn’t a headrest on the vehicle seat.
I love that you can install the highback booster with LATCH. Not only does it keep the booster in place while kids are constantly getting in and out of the car, but it prevents the seat from being a projectile if there is a crash when the booster is unoccupied.
Personally, I’d keep your kid in the highback booster as long as possible. But once they hit 100 pounds, you’ll have no choice but to switch to the backless booster. Another reason you might switch to backless is if you have multiple car seats side-by-side in the vehicle. The backless booster takes up less space, which may be necessary in this situation.
Again, both modes are safe. Just make sure the seat belt is in the right place every ride!
How do I know when my child is ready to use only the seat belt?
Here’s how to test if your kiddo is ready to graduate from a booster:
Have your child sit up straight with their bottom all the way back in the seat and buckle up.
- Their feet must be flat on the floor.
- The shoulder belt must come across their collarbone, not their neck.
- The lap belt must lie flat across their hip bones and upper thighs, not their belly.
- The child must have the maturity to stay in this position for the entire ride, every time.
If ALL of these conditions are met, they are ready to use only the seat belt! If not, they need to continue using a booster. If your child outgrows the 4Ever DLX convertible car seat before being ready to use just the seat belt, you’ll need to purchase a new booster with a higher weight limit.
Generally, a child will not fit these requirements until they are at least 4’9” tall. But reaching this height is not a guarantee that they won’t need a booster. All bodies are different, so passing the test will ensure they are safe and snug in the seat belt.
How safe is the Graco 4Ever DLX?
As a Child Passenger Safety Technician, obviously the most important feature to me is SAFETY! I tell parents that a car seat is only safe if it can be installed and used correctly every ride. That’s what I love about the Graco 4Ever DLX convertible car seat. It has features like lock-off and push-on lower anchor connectors that make installing it right easy. The manual is so well-written, and it nicely explains how to properly secure the child in the seat at every stage.
FMVSS 213
Parents can rest easy knowing that any and all car seats sold by reputable companies (like Graco) are crash-tested and safe. All car seats must stand up to rigorous safety criteria outlined by Federal Motor Vehicle Safety Standard 213. The Graco 4Ever DLX EXCEEDS minimum requirements for crashworthiness, flammability, and other important safety features.
ProtectPlus Engineered
Every Graco car seat is “ProtectPlus Engineered.” The Graco 4Ever DLX is no exception. The seat has been tested to keep your child safe in a frontal, rear, side, or rollover collision. Graco goes beyond FMVSS 213, and puts their seats through crashes double the force required by law. The materials have been proven to hold their integrity during extreme cold and hot weather.
NHTSA Ratings
The National Highway Traffic Safety Association (NHTSA) rates car seats with 1-5 stars in four categories. How do they rate the Graco 4Ever DLX convertible car seat?
1. Evaluation of Labels: Are the labels on the seat clear and easy to understand?
5 stars for rear-facing and forward-facing; 4 stars for booster mode.
Labeling is a bit lacking for booster mode. Be sure to follow the green color for the correct seat belt routing in higback and backless booster mode.
2. Evaluation of Instructions: Is the instruction manual thorough yet easy to follow?
5 stars for all modes.
I agree! The manual is easy-to-follow, color-coded, and extremely helpful.
3. Securing the Child: How easy is it to properly harness or secure the child?
Rear-facing 4 stars; forward-facing 5 stars; booster 3 stars.
It may be more difficult to correctly secure a child in the booster mode. Make sure to read and re-read the 5-star manual to make sure you’re doing it right!
4. Installation Features: How easy is it to install the seat?
Rear-facing 3 stars; forward-facing 4 stars; booster 4 stars.
Installation in rear-facing mode may be difficult or confusing for some parents. Again, the manual is your go-to! Graco also makes installation videos available on YouTube. If your community offers car seat check events, getting professional help from a CPST might be a good idea.
How easy is the Graco 4Ever DLX to clean?
I LOVE how easy it is to clean the Graco 4Ever DLX! First of all, the Rapid Remove cover can be taken off without uninstalling the seat. Just throw it in the washer with mild laundry detergent, then hang to dry. When (not if) the crotch buckle gets sticky, clean it in warm water by rubbing the plastic and pressing the red button until it’s good as new. You can wipe the harness straps and hard plastic parts of the seat with a damp rag and mild soap.
You are going to have the same car seat for TEN YEARS! Think about how many accidents and spills are bound to happen… then think about how easy they will be to clean up in the Graco 4Ever DLX!
Features
Steel-Reinforced Frame
This seat is engineered to last ten years, so it needs to be made with strong materials! The steel-reinforced frame ensures that the Graco 4Ever DLX will stand up to the test of time.
No-Rethread Simply Safe Adjust Harness
This might just be my FAVORITE feature. Simply squeeze the handle at the top of the seat and raise or lower the harness to the necessary height (at or below the shoulders for rear-facing; at or above for forward-facing). There are ten positions to choose from, ensuring that your child has a snug, safe harness at all ages.
Fabric
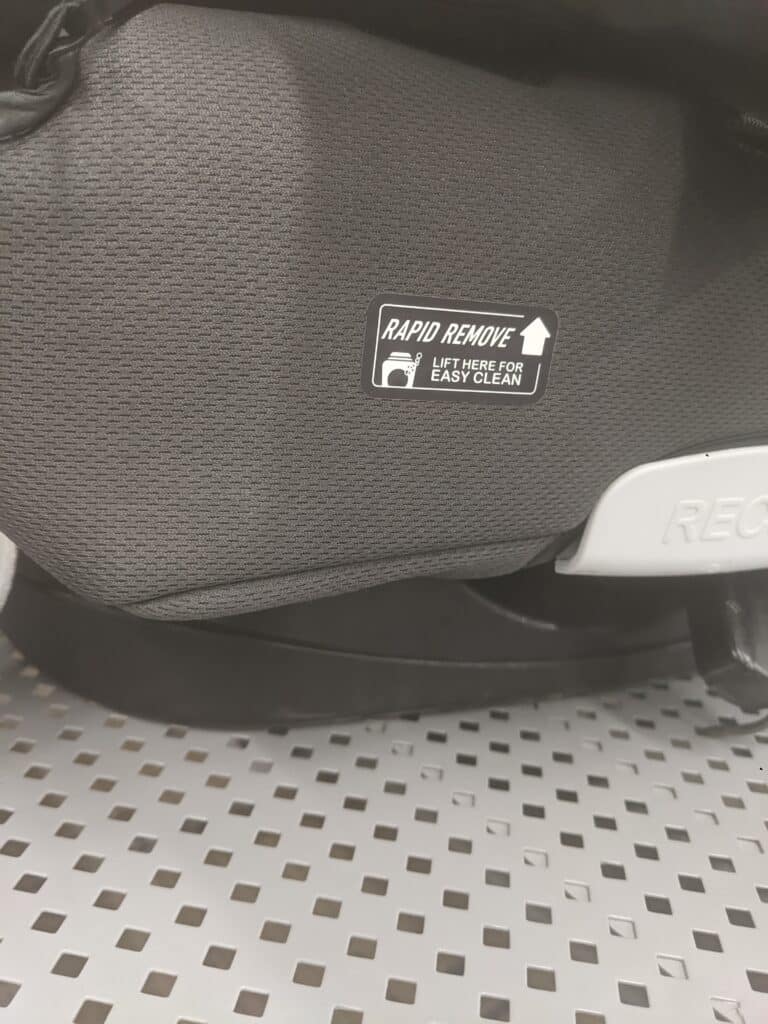
An awesome feature of this car seat is the Rapid Remove cover. It’s machine washable! The fabric itself is smooth and cushy. There is a decent amount of padding all around the seat. The texture isn’t the absolute best on the market, but it ranks at the top of the pack in my opinion.
Recline Angle Indicator
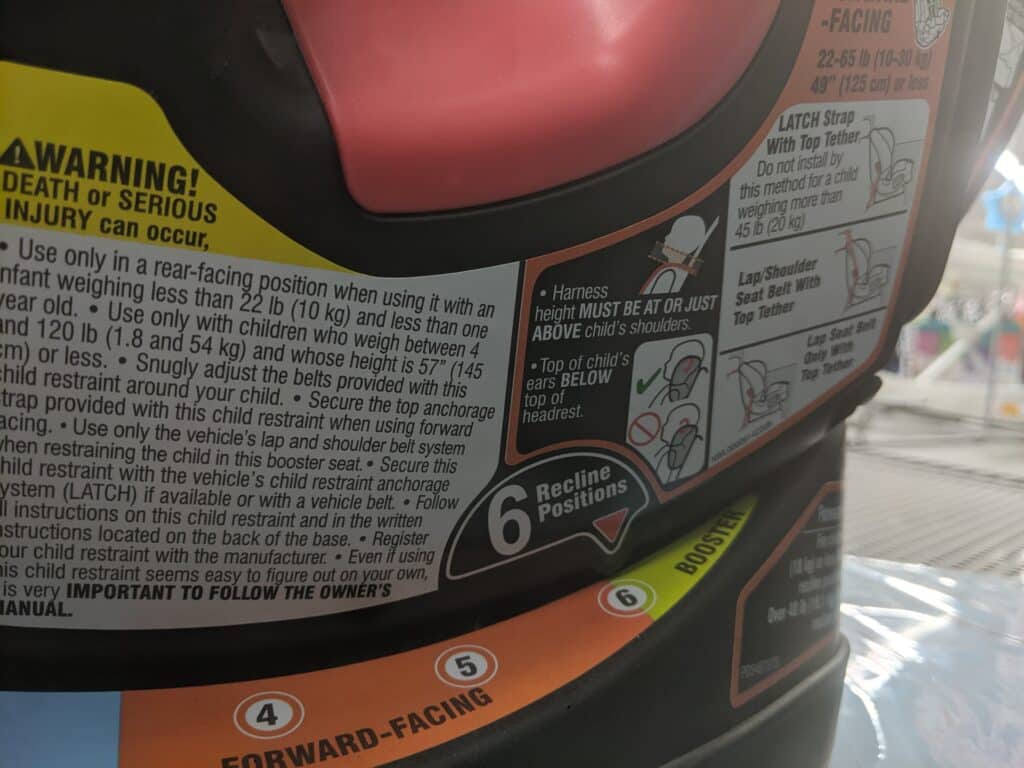
The recline angle indicator is located on the upper left side of the seat. When rear-facing, make sure the bubble is completely within the blue line on the indicator. If not, the seat is not properly reclined. Infants need to be at a specific angle in order to keep their airway nice and open. If they are sitting further up in their car seat, there’s a danger of cutting off air supply. Unfortunately, babies have died because their car seat was not properly reclined. Use the recline angle indicator to make sure your child stays safe!
Front to Back Space
Front to back space is the amount of room the car seat takes up in the car. It’s measured from the tip of the headrest to the tip of the seat panel. The 4Ever DLX convertible car seat is actually fairly compact for a 4-in-1. It clocks in at 28 inches front-to-back when rear-facing with the lowest harness setting and recline position 1. This is the position the seat would be in for a newborn. The front to back space will differ as the harness height, recline angle, and direction of the seat change.
Recline Positions
There are 6 recline positions. The variety of recline angles ensures children are safe and comfortable at every stage.
InRight LATCH
Graco’s InRight LATCH system has easy-to-use push-on lower anchors. The 4Ever DLX can be installed with LATCH when the child weighs 45 pounds or less. After 45 pounds, the seat needs to be installed with the car’s seat belt.
Harness Storage Slots
On either side of the seat, there are rubber slots to store the metal crotch buckle tongues. As a CPST, I love these! They keep the harness tucked out of the way when you are placing your baby into the seat. I’ve found this especially helpful with newborns, who like to squirm and grab anything they can get their hands on.
What is included with the Graco 4Ever DLX?
Two Infant Inserts
The 4Ever DLX convertible car seat comes with two infant inserts: a head support and a body support. The body support must be used if the baby’s shoulders do not reach the lowest harness setting. It goes underneath the baby’s bottom, boosting them up enough so that the harness is at or below their shoulders. The optional head support provides a little extra cushion around their head. It must be behind the head, not falling down behind the back. (This can cause the head to be pushed forward, causing an issue with air supply!) If you choose to use the head support, you must ALSO use the body support. But you can use the body support on its own if you don’t want to use the head support. Both infant inserts can only be used when rear-facing.
Shoulder Pads
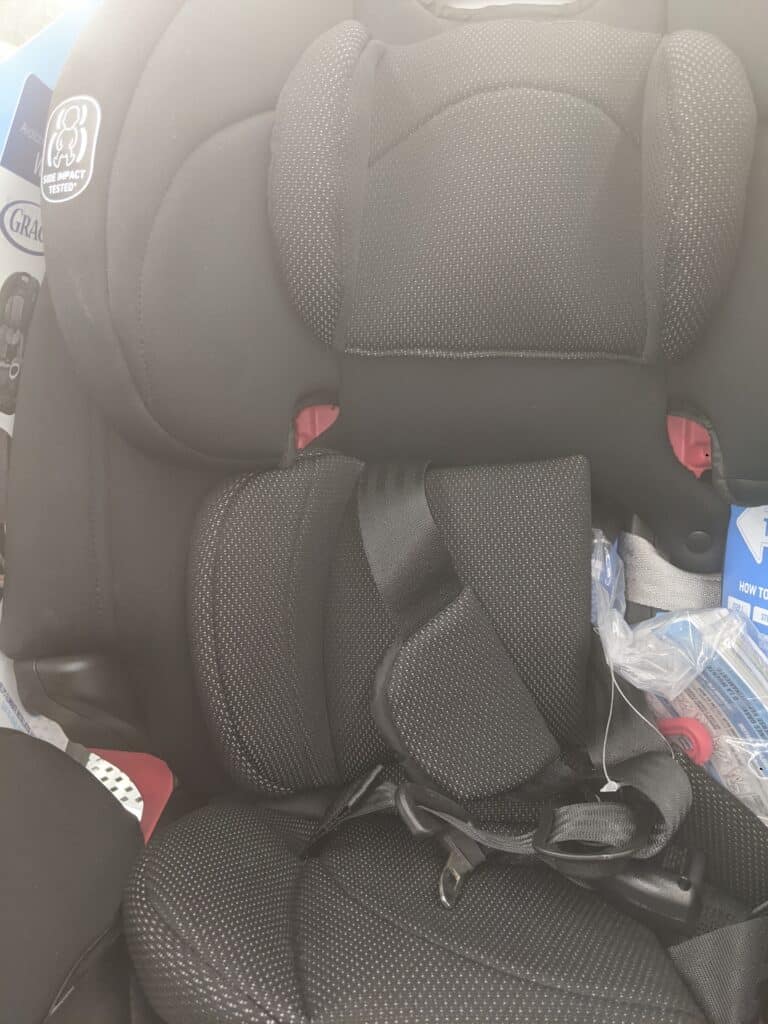
The shoulder pads included with the Graco 4Ever DLX are velcro-style. I prefer this over sewn-on style because they are easy to remove. If you can’t get the chest clip up high enough on a newborn, you’ll need to remove the shoulder pads. Once the infant is bigger, you can replace them. Never use shoulder pads that didn’t come with the seat. If you don’t like these ones, simply don’t use them. They are not required for the safety of the child.
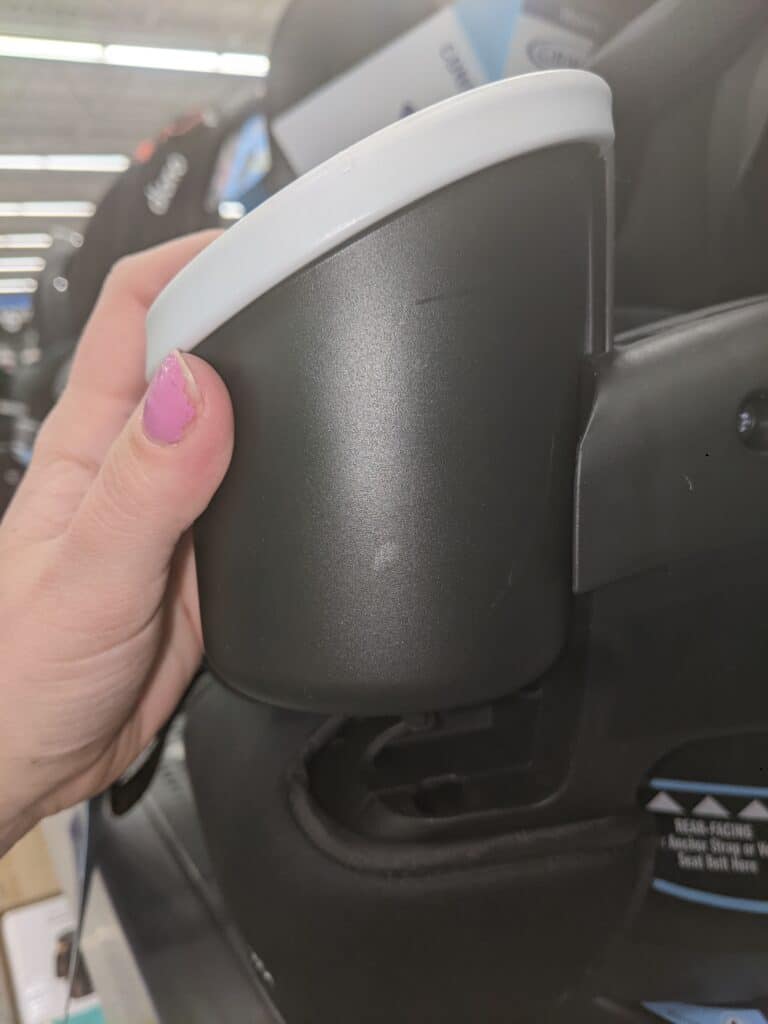
Two Cup Holders
Graco requires cup holders to be installed. Look at the bottom of each one to find the letter identifying which is left (L) and right (R). The left and right sides are from the perspective of a child sitting in the seat. Push the fabric cover away to reveal the slot in the seat. Line the cup holder up with the slot and push down. You may have to use both hands and put some weight into it! Listen for a “click” to know you’ve fully installed the cup holder. Repeat the process for the second side.
Belt Positioning Clip
This looks like a black strap with a red plastic clip on one end. This is only used in backless booster mode if a good shoulder belt fit cannot be achieved with the seat belt alone. Keep it in a safe place, because you won’t need it until your child is at least four years old!
Are there additional accessories I can buy?
Never buy any accessories (head support pillows, shoulder pads, seat covers, etc.) that are not approved by the manufacturer for that exact seat.
Third-party sellers (think Amazon, Walmart, and similar large distributors) do not crash-test their products. They are not safe to use in any car seat! If an accident occurs and there are after-market additions to the seat, the warranty may be voided.
Graco does not have any accessories available for the 4Ever DLX. Therefore, there are NO safe accessories you can add to this seat! What’s in the box is all that you can use.
Where to find important information
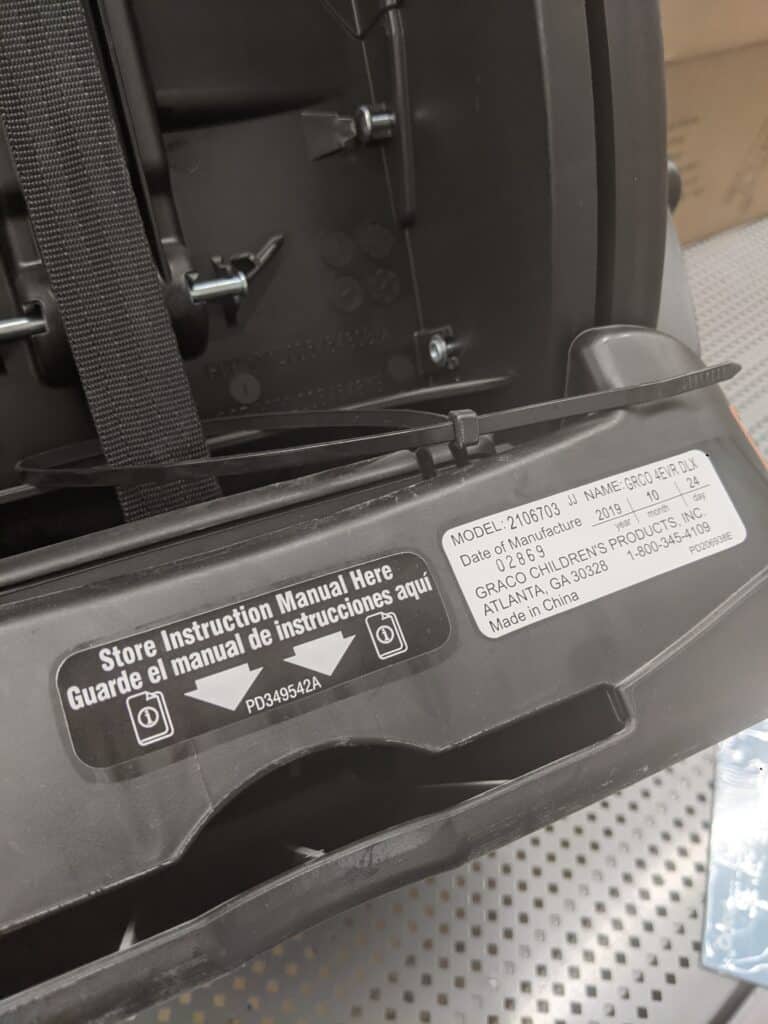
Manual Storage: A manual storage slot is located on the back of the base. The only irritating thing is that you can only access this slot while the seat is rear-facing (or uninstalled). You can find a handy downloadable version on Graco’s website.
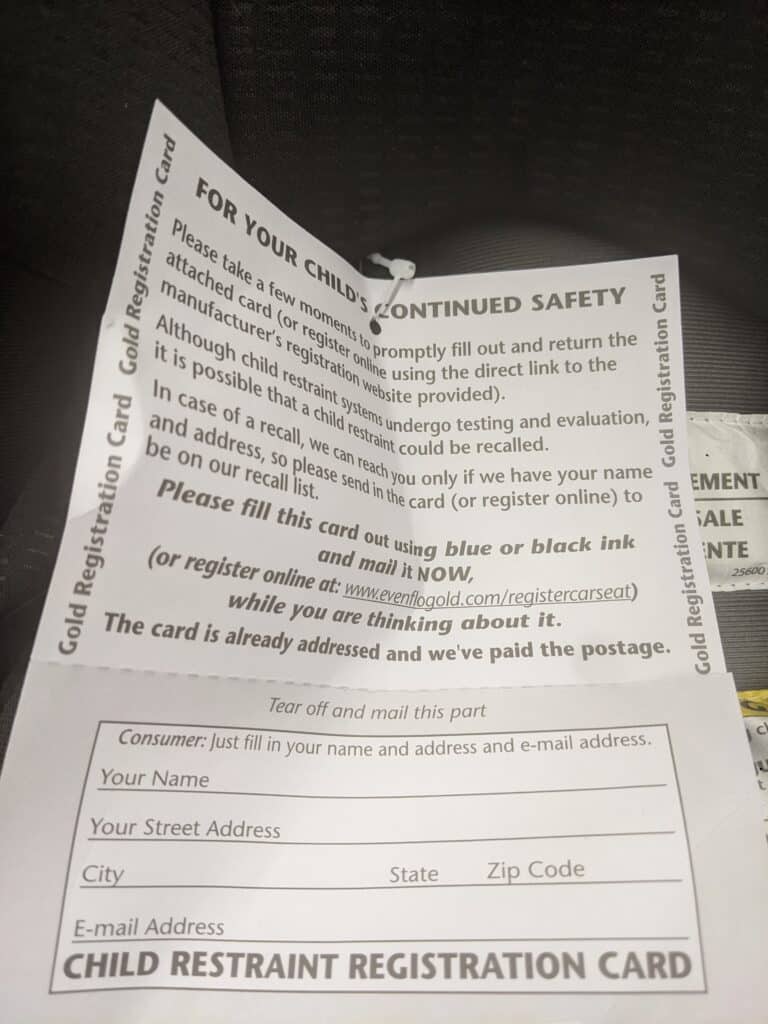
Registration Card: The mail-in registration card is fastened to the harness upon removal of the seat from the box. You can either fill out this postage-paid card and drop it in a mailbox, or use the information to complete the form on Graco’s website under “Product Registration.” Be sure to register the seat so you can be informed of any recalls!
FAA Approval: You can find the FAA approval on a sticker* on the back of the seat. This statement is always in red print. Know where to locate this if you plan to use the seat on an airplane– the gate agent might ask to see it!

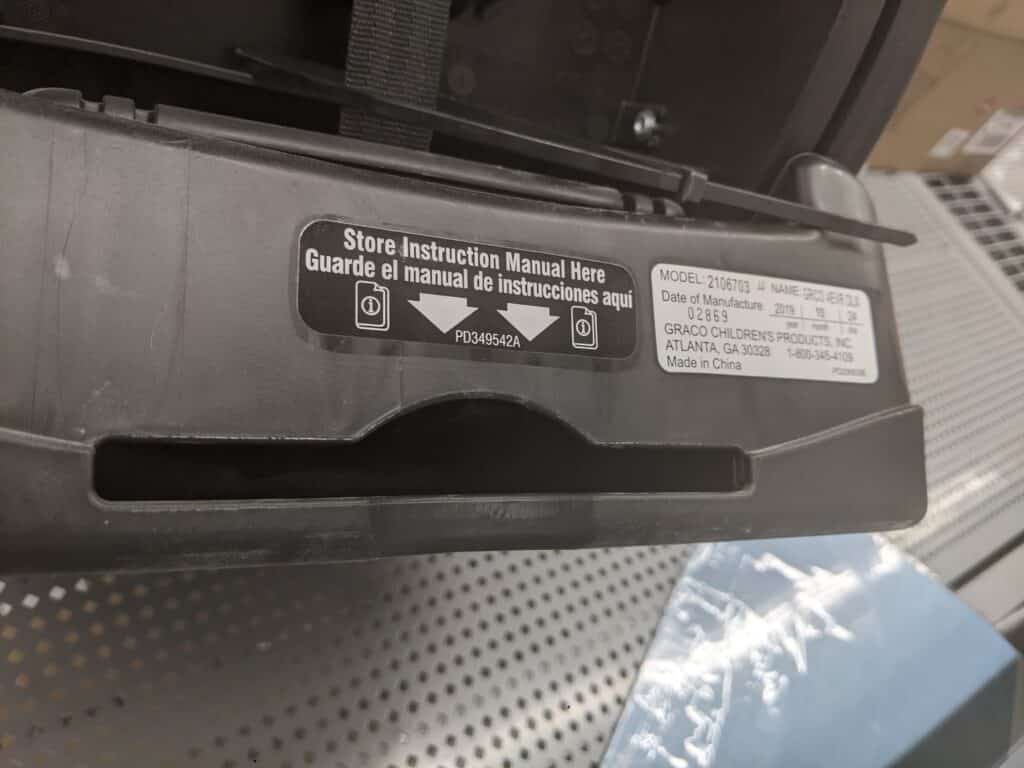
Manufacture Date/Expiration Date: There is a sticker* right next to the manual storage slot which has the manufacture date, model number, and Graco’s phone number. The Graco 4Ever DLX has a ten-year expiration date. There is nothing on the seat that says “expiration date.” Just find the manufacture date and add ten years.
Gracobaby.com: Graco’s website has so many helpful pages. You can download the manual, register the seat, view FAQs, order replacement parts, and contact the manufacturer.
Graco YouTube: Simply named “Graco,” the manufacturer’s YouTube channel has hundreds of installation and use videos. For visual learners, watching videos might be easier to understand than reading the manual.
*If either of these stickers are missing or not as I described, you may have a counterfeit car seat! Stop using the seat immediately. Contact Graco directly for instructions on what to do.
Frequently Asked Questions
Is the Graco 4Ever DLX good for a newborn?
Yes! The Graco 4Ever is designed to be safe and comfortable for children of all ages. From the day you take your bundle of joy home from the hospital to picking her up from soccer practice, this seat will be with you every step of the way. Newborns as little as 4 pounds are able to sit in a Graco 4Ever.
How do I recline the Graco 4Ever DLX?
To recline the Graco 4ever DLX, simply pull the recline handle right under where a child’s legs would be dangling. Slide the seat into the position you want and release the handle. You will hear the seat lock into place. There are six possible recline positions.
Rear-Facing: Positions 1-3 (indicated by the color blue) are for rear-facing. When rear-facing, the bubble indicator (found on the top left side of the seat) must be completely within the blue line.
Forward-Facing: Positions 4-6 (indicated by orange) are for forward-facing. If the child is 40 pounds or less, the seat must be in recline position 4 or 5. If the child is over 40 pounds, position 6 is the only option.
Booster: For both highback and backless booster modes, the seat must be in recline position 6.
Does the Graco 4Ever DLX fit in strollers?
No. None of the Graco 4Ever models fit in strollers. These convertible car seats are meant to be left in your car once installed.
Can I carry the Graco 4Ever DLX car seat?
The Graco 4Ever DLX is not designed as an infant car seat carrier. The seat alone may be transferred between vehicles, but you should not carry a child in the seat. It is best practice to keep the seat in the car once it has been installed.
When should I remove the infant inserts?
The infant head and body supports MUST be removed when you turn the seat forward-facing. However, you may take them out while the seat is still rear-facing if the infant doesn’t need them anymore. Remember, the harness slots must be at or BELOW the child’s shoulders when rear-facing. As soon as this can be accomplished without the supports, you may take them out.
How do I remove the cup holders?
The cup holders must be installed when using the 4Ever DLX. Per Graco: once installed, they must not be removed, even for cleaning. They are not dishwasher safe. To clean, simply wipe down with mild soap and water.
Even though Graco does not approve, I could see why a parent would want to take a cup holder off to give it a deep scrub, especially after a sticky spill, crayon-melt crisis, etc. So I tried.
Here’s the truth. For the life of me, I could not get the cup holders out of the Graco 4Ever DLX!
There is a video circulating on the internet that shows a woman hitting the bottom of the cup holder with a rubber mallet. However, as a CPST, I highly recommend AGAINST this method! It’s not designed to work like that. This could potentially cause damage to the shell of the seat, rendering it less safe.
The best option is to just keep the cup holders installed, and wipe them down every once in a while.
When and how should I dispose of a car seat?
You should dispose of a car seat once it has expired, or if it has been in a crash. And I’m not just talking about a major collision. Any crash, even a fender bender, means you need to get a new seat.
If you’ve been in a crash, oftentimes your car insurance will cover the cost of a new seat. In the meantime, don’t use the seat. Contact the manufacturer (Graco if you have the 4Ever DLX). They may be able to exchange the seat or direct you to more resources.
Target hosts a trade-in event twice a year where you can bring in an expired or damaged car seat in exchange for a 20% off coupon good on a new seat or another baby item. Not only is this a great deal for you, but it’s a win for the environment too! The seats are recycled and kept out of landfills. Target consistently holds this event nationally in the United States, but there may be other retailers in your area offering a similar program.
If you don’t have a trade-in option available near you, contact your local recycling center. They can tell you how to dismantle the seat in order to recycle the different components.
Car seat manufacturer Clek has partnered with CarSeatRecycling.com to offer recycling from anywhere in the US. For $40-65 (depending on the type of seat), you can get a recycling kit shipped to you. Then you bag up your seat and drop it off at a UPS store. In exchange for recycling your seat, you have the choice of either a $10 gift card or 10% off code for Clek products.
When trade-in and recycling are both out of the question, make sure to dismember the seat before throwing it away. This ensures that no one picks it up and tries to use an expired or damaged seat.
Specifications
Width: 21.5 inches
Height: 24 inches
Depth: 20 inches
Weight: 23 pounds
Which model should I get?
4Ever DLX
This is the standard and most popular model of the Graco 4Ever 4-in-1 Convertible Car Seat. The 4Ever DLX replaces the discontinued 4Ever. Everything in this review pertains to this particular seat. All of the following seats have the same characteristics as the 4Ever DLX, with additional unique features.
Who should get this model: The 4Ever DLX is the most purchased 4Ever model. It is one of the cheapest options (tied with the 4Ever DLX Snuglock). It’s a great choice with standard features that aid in installation and child comfort. I believe most parents would enjoy this seat.
4Ever DLX Snuglock
The difference with this seat is that it has Graco’s patented Snuglock technology. This allows for easier installation– one minute or less with either seat belt or LATCH! I like that it has a lock-off for both rear-facing and forward-facing. The 4Ever DLX only has a forward-facing lock-off.
When comparing the fabrics, I found the 4Ever DLX Snuglock to have silkier, softer material.
This model is only 19 inches wide, 2.5 inches slimmer than the 4Ever DLX. That extra space is handy when you need to install multiple car seats side-by-side.
The seat base is 1 inch deeper. This could be a problem in vehicles with bench seats, where overhang is a concern.
Who should get this model: I actually prefer the 4Ever DLX Snuglock model over the 4Ever DLX. They cost the same, and the Snuglock technology makes installation so much easier. This is a good option for older vehicles that don’t have locking seat belt retractors. Lock-offs eliminate the need for annoying locking clips. Unless you have a vehicle where the seat base might overhang more than the acceptable 80%, I would go with this model.
4Ever DLX Snuglock Grow
The 4Ever DLX Snuglock Grow has lock-offs for both rear- and forward-facing. It has additional “grow technology.” As you increase the headrest height, the backrest widens. This is a great feature for overweight children, or those with broader torsos and shoulders.
Because of the widening backrest, this would not be a good option when you need to put multiple seats side-by-side. The grow feature comes at a price too. This seat is $50 more than the 4Ever DLX.
Who should get this model: The 4Ever DLX Snuglock Grow is the best choice for overweight and obese children.
4Ever Extend2Fit
The 4Ever Extend2Fit has an extension panel that pulls out from underneath your child’s legs to provide up to 5 inches of additional leg room. Graco claims this allows a child to safely rear-face for longer. However, as long as a child is within the weight limits, their leg position does not matter for safety. Most children don’t care or even notice what position their legs are in when they are sitting in their car seat. Legs can be straight up on the seat back, crossed, or hanging off the sides of the car seat. We don’t see serious injuries resulting from these positions.My professional opinion is that leg extension panels are unnecessary and not worth $30 more. It’s tempting to use the extension panel forward-facing, but it can only be used rear-facing.
This seat allows for extended rear-facing up to 50 pounds. Rear-facing is the safest way a child can travel. I always say that if everyone could ride rear-facing, we’d all be a lot safer! I love the extra 10 pounds this seat affords.
Even with the extension panel, the 4Ever Extend2Fit takes up less front to back space. The more compact size is good for taller parents so they can put their front seat back further from the dashboard.
Who should get this model: The 4Ever Extend2Fit is a good choice for taller parents. The compact size allows front seat passengers to sit further from the dashboard. We want everyone in the car to be safe, not just the baby! The longer rear-facing limit is beneficial for children who need to rear-face for longer. All children are safer in this position, but especially children with certain special needs.
Premier 4Ever DLX Extend2Fit
The Premier 4Ever DLX Extend2Fit has an extension panel that provides up to 5 inches of additional leg room when rear-facing. Again, I think these panels are unnecessary, and shouldn’t really be considered when comparing car seats.
Children can rear-face up to 50 pounds in this seat. Keeping kids rear-facing longer keeps them safer!
An anti-rebound bar sets this seat apart from the 4Ever Extend2Fit. There is some evidence that this keeps rear-facing kids safer by limiting the motion of the car seat in a crash.
The base depth is 28.5 inches. This is significantly deeper than the 4Ever DLX, which could be a major problem in vehicles with shallower seats. Remember, at least 80% of the base must be in contact with the vehicle seat.
Graco’s Premier line boasts higher-end materials and designs. These features are all about the look and feel, not the safety of the seat. Of course, fancier features come at a price. This seat costs $70 more than the 4Ever DLX.
Who should get this model: The Premier 4Ever DLX Extend2Fit could be a good option for kids who need to rear-face for longer, but if that’s all you want, go for the cheaper 4Ever Extend2Fit. If you are interested in an anti-rebound bar, consider this seat. Parents who prefer more luxurious materials and designs will like the Premier line.
Premier 4Ever DLX Extend2Fit Snuglock
The Premier 4Ever DLX Extend2Fit Snuglock has an extension panel that provides up to 5 inches of additional leg room when rear-facing. I wouldn’t factor this into your decision.
This seat allows children to rear-face up to 50 pounds. As a CPST, this is my favorite aspect!
Another safety feature is the anti-rebound bar. These can help reduce the motion of the car seat in a crash, and may prevent some injuries.
The base depth is 28.5 inches. This is significantly deeper than the 4Ever DLX, which could be a major problem in vehicles with shallower seats.
Graco’s Premier line boasts higher-end materials and designs. These features are all about the look and feel, not the safety of the seat.
Snuglock technology includes a lock-off for both rear- and forward-facing. Installation is much easier using these lock-offs!
This is the heaviest seat in the 4Ever line, clocking in at over 28 pounds. It may not be a good choice if you need to transfer the seat between vehicles often.
Essentially, this seat combines every feature available in the 4Ever line of products. For that reason, it costs a whopping $100 more than the 4Ever DLX
Who should get this model: If cost and weight of the seat are not an issue, parents who want to enjoy every benefit of the 4Ever line will like the Premier 4Ever DLX Extend2Fit Snuglock.
How does the Graco 4Ever DLX compare to other all-in-one car seats?
Graco Grows4Me vs Graco 4Ever DLX
What’s the difference?
Pros
- Very similar to the 4Ever DLX
- Cheaper
Cons
- Hook-style LATCH connectors
- No infant head support insert
- No lock-off
- Only one cup holder
- No harness holders
- 5 pound lower limit
- Cover is not “Rapid Remove” (but it’s still machine-washable)
Recommendation? This is basically the simpler version of the 4Ever DLX. While it looks like I have a big list of “cons,” they’re all mostly superficial. This is still a really great 4-in-1 car seat! Premature infants may not fit in the Grows4Me due to the 5 pound minimum weight and lack of an infant head support pillow.
Britax One4Life ClickTight vs Graco 4Ever DLX
What’s the difference?
Pros
- Easy to install rear- or forward-facing with ClickTight lock-off
- SafeCell technology crumple zones
- 15-position no-rethread harness
- 9 recline positions
- V-shaped tether (reduces forward movement in a crash)
- Easily removable dishwasher-safe cup holders
- Rear-facing to 50 pounds
Cons
- No backless booster
- Expensive
- 5 pound lower limit
Recommendation? This is truly an awesome seat. With 15 headrest and 9 recline positions, you can get a perfect fit for your child. Added safety features like crumple zones and a V-shaped tether make this an incredibly safe car seat. However, the Britax One4Life ClickTight is on the higher end of the budget.
Chicco Fit4 vs Graco 4Ever DLX
What’s the difference?
Pros
- 9 recline positions
- Dishwasher-safe cup holders
- FitKit– layers of padding that come out with each stage
- Can fit three across in a vehicle
Cons
- More expensive
- No backless booster
- Only goes up to 100 pounds
- Foam behind the headrest tends to come unglued
Recommendation? I like that the Chicco Fit4 has different padding layers. As the child grows, layers are removed. This helps keep the seat clean over ten years of use. I don’t really think this seat is worth the extra money though, unless you need to fit three car seats side-by-side.
Evenflo All4One DLX vs Graco 4Ever DLX
What’s the difference?
Pros
- SensorSafe chest clip
- 12-position no-rethread harness
- Red pull-tab for easier removal of LATCH connectors
- Crotch buckle cover
- Highback booster goes up to 120 pounds
- Cheaper
Cons
- Flimsier cupholders
- Rougher material
- LATCH connectors are harder to push on
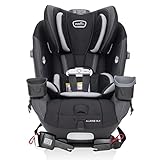
Recommendation? The Evenflo All4One DLX has new SensorSafe bluetooth technology that alerts you of unbuckling, dangerous temperatures, and leaving a child in the car. This is really good for the kids that we CPSTs like to call “escape artists”– children that constantly unbuckle themselves. It’s so cool that your phone can let you know if you accidentally lock a child in the car! A true 4-in-1 car seat, the Evenflo All4One DLX with SensorSafe is a tight competitor with the 4Ever DLX.
Evenflo EveryKid vs Graco 4Ever DLX
What’s the difference?
Pros
- Crotch buckle pad
- 12-position no rethread harness
- Highback booster goes up to 120 pounds
- Cheaper
Cons
- Lower quality material, flimsier plastic
- Bulky– doesn’t fit next to another car seat
- Hard to install, even for CPSTs
- Hard to tighten harness on child
- Install may loosen with use
Recommendation? As a CPST, I cannot recommend this seat. It’s just too easy to mess up install and harnessing. There are better, safer options at a similar price point.
Diono Radian 3R vs Graco 4Ever DLX
What’s the difference?
Pros
- Fits 3 across in the car
- Highback booster up to 120 pounds
- Rear-faces up to 50 pounds
- Folds up for compact transport
- Expandable seat pan
Cons
- No backless booster
- 5 pound lower limit
- No infant inserts
- Not much padding
- No cup holders
- No armrests
Recommendation? Excellent option if you need to fit multiple seats side-by-side in the car. I love that the seat pan folds up for compact transport. The Diono Radian 3R is bare bones though, and doesn’t have a lot of the bells and whistles featured on other all-in-ones.
Safety 1st Grow and Go Sprint vs Graco 4Ever DLX
What’s the difference?
Pros
- Padded crotch buckle protector
- Comfortable, silky material
- Machine-washable cover is also DRYER-safe
- Easy-to-remove, dishwasher-safe cup holders
- Harness holders for crotch buckle tongues AND chest clip
- Almost $100 cheaper
Cons
- 5 pound lower limit
- No backless booster (highback only up to 100 pounds)
- Very thin infant supports
- Only 3 recline positions
- A bit trickier to install (cover doesn’t snap open)
- Removable cup holders could be a projectile if the child figured out how to take them off
Recommendation? Honestly, this is a great option for a budget all-in-one. I would buy this seat! True, it doesn’t have some of the “fancier” characteristics of the 4Ever DLX, but it is a solid contender at a much cheaper price. The Safety 1st Grow and Go Sprint will not work for premature infants because of the 5 pound minimum weight and thin supports.
Cosco Easy Elite vs Graco 4Ever DLX
What’s the difference?
Pros
- Under $100
- Fits 3 across in most cars
- Removable cup holder is easier to wash
- Machine-washable AND dryer-safe seat pad
Cons
- Huge chest clip (could be an issue with newborns)
- No backless booster
- Highback booster only goes to 80 pounds
- Forward-facing only until 50 pounds
- Only 1 cup holder
- No infant head support insert
- Parents struggle to get a tight install
Recommendation? Saving a little bit of money is not worth buying this bare-bones seat.
Verdict
The verdict is in: the Graco 4Ever DLX is CPST-approved!
While it may not be my #1 favorite 4Ever model (the 4Ever DLX Snuglock beats it out by a hair), it’s a very close second.
The 4Ever DLX holds its own against other all-in-one car seats. It’s in the middle of the pack price-wise. Features like InRight LATCH and forward-facing lock-off help parents get a tight and safe install every time.
The bottom line is that the Graco 4Ever DLX is a solid choice for an all-in-one car seat. In this seat, your child will be safe and happy for years to come!







Thank you very much. I really appreciate your great effort. I have searched couple of websites, even the Graco website, but I couldn’t find all my needed answer except here. You have explained the differences between almost all the models, very clearly. For me buying this item, is an investment, So I like to know all my options very well and very clearly, Which is what you provided here.
if I may mention, that there are 4 more terms associated with Graco car seats, I believe would be good to explain, which are (Platinum, premier, SnugLock, TrueShield).
I highly Appreciate your effort and Time…